I love taking macro photos. There is so much beauty in nature and objects the closer we look at them. Taking great close up (macro) photos isn’t as easy as turning the dial on your camera to the flower and firing away. Here are 10 things you should think about before you start taking photos of that fly on the windowsill.
1. Do I have the right equipment?
There are specific lenses that are made for close up photography and then there are lens extensions that you can put on your non macro lenses that will allow you to focus closer to your subject.
- An example of a macro lens for a DSLR would be the Nikon 105mm Micro.
- An example of a lens attachment would be extension tubes and close up lens filters.
I started out taking close up photos with close up filters, then moved to extension tubes (they aren't that expensive), then finally graduated to the actual macro lens. I definitely prefer the actual lens to the lens tubes or filters. Not to say you can't get very cool results with the tubes or filters, it's just a little more work. There are some limitations to extension tubes and magnifying filters. Extension tubes work with your existing lenses. They can double your aperture value which means you either need more light or longer exposure times. Close up lens filters don't give you a lot of control over your depth of field. But again, they can be relatively inexpensive and a great way to get creative.
2. Study the subject you will be photographing
The great thing about shooting an object and not a person is that you can sit there and stare at it without it feeling uncomfortable. For example, if you are going to take close up photos of a flower, look at the flower from different angles. Find specific details that you want to capture before you even take your camera out of the bag.
 3. Composition is key
This is just a universal truth in photography. No matter if you are shooting close up photos, portraits, or landscapes. A nicely composed photo or a boring subject can trump a poorly composed photo of an exotic subject.
4. Light
Just as lighting is important in regular photography, it is equally if not more important in macro photography. The good thing is that you are dealing with such a small area that you can get creative with your lighting tools.
- Window light is free.
- Experiment with flashlights.
- Create small light boxes to help control sunlight and wind when shooting in nature.
5. Wind is your enemy
In fact, any kind of movement is can be your enemy. Photographing in a controlled environment is much easier than one that isn’t.
6. Tripod or no tripod?
Here is the thing about macro photography. You are, in a sense, enlarging a scene that is inherently much smaller. When you do that the tiniest movement from your camera can ruin the photo (also see #5). Putting your camera on a tripod can eliminate the camera movement issue. I have a love/hate relationship with my tripod. I love that it keeps my camera perfectly still, but I hate that I may have to mess with it 100 times before I get it exactly where I want it (See #7).
7. Set aside a block of time
That basically means that if you want to get the best photos you can you may be there for a while. Patience is a virtue when taking macro photos. If you are shooting a still subject like a flower you may reposition that or your tripod a dozen times before you get exactly the shot you want.
Capturing a close of something living (ie a butterfly) can take hours. Come with your patience hat on.
8. Aperture dramatically affects the photo you want
After lighting, I would say that figuring out the depth of field you want is the next most important element to a great macro photo. If you want your entire subject in focus, you may be shooting with a smaller aperture (from f8 – f16. I’m not a fan of f22). On the flip side, when you only want selective parts of your subject in focus you will shoot with a shallower depth of field or larger aperture (ie f2.8 – f4).
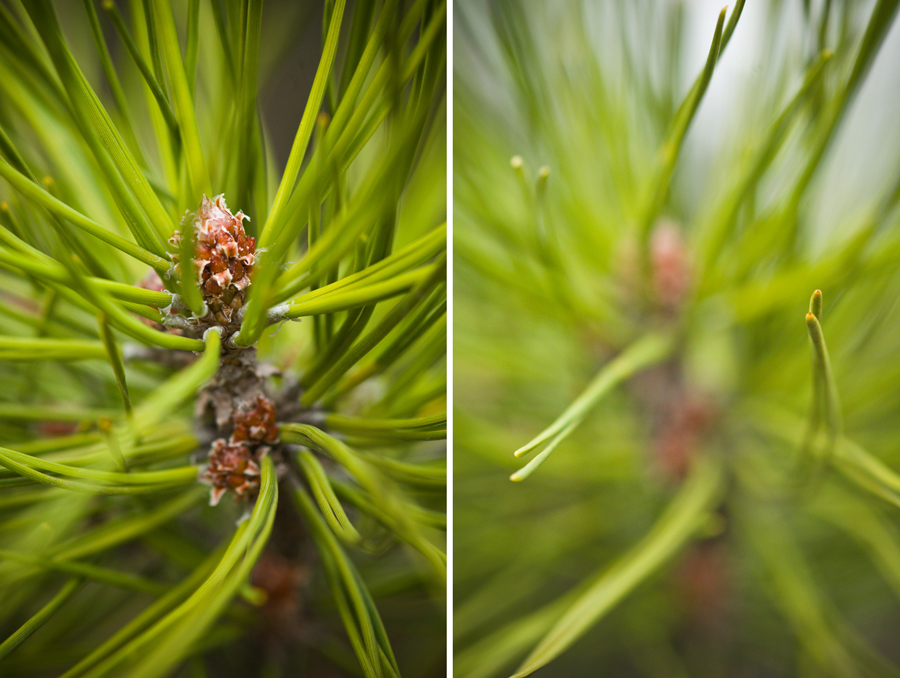 The same subject taken two different ways. The first with a smaller aperture (f8) to get more in focus & the second at a much wider aperture (f2.8) to get the interesting depth of field.
9. Watch your background
A distracting background can ruin a close up photo just like any other photo. Try to keep your background free from anything that will distract you from the subject of the photograph.
10. Fine-tune in Photoshop
Try to get as much right when you take the photo so that you don’t have to rely on Photoshop to save your photo.
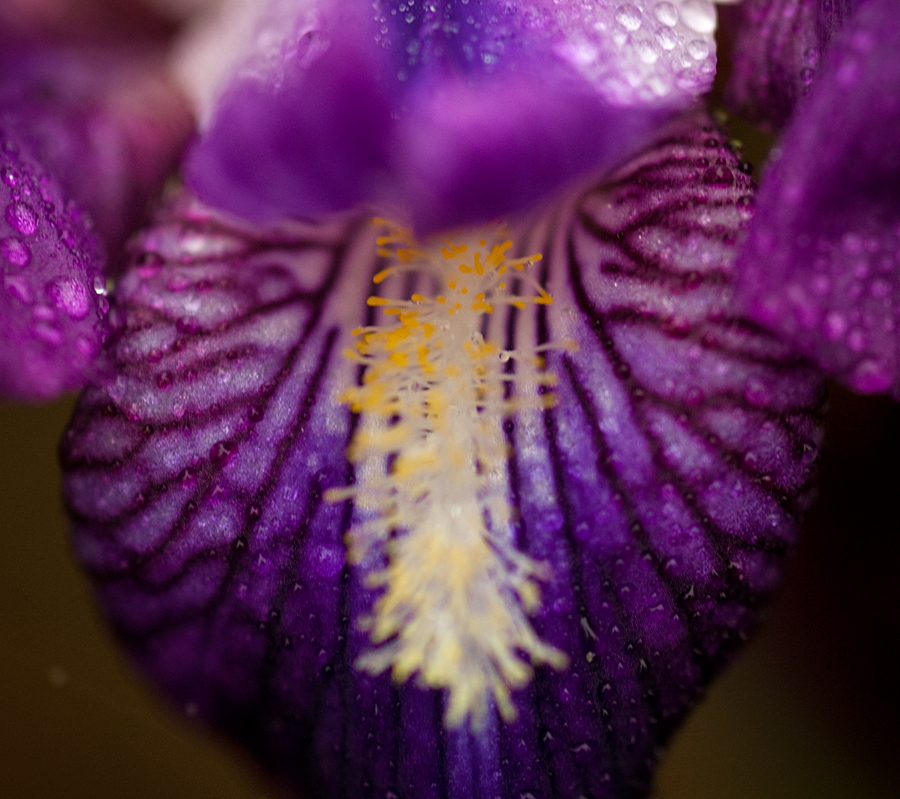
 The dark edges of the photo were captured when taken. I only used Photoshop to increase the contrast and add a touch of saturation.